


Safety & Emergency Response
Stop The Bleed | CPR | AED Use
Safety | CPR - AED & Stop The Bleed

Emergency Response Overview for McKinney Ice Hockey Club
1. CPR (Cardiopulmonary Resuscitation)
CPR is a life-saving technique used when someone’s heart has stopped beating. In the event of a cardiac arrest on or off the ice, performing high-quality chest compressions can keep blood flowing to the brain and vital organs until professional help arrives. Coaches, players, and staff are encouraged to be CPR-trained to respond quickly and confidently in emergencies.
2. Stop the Bleed
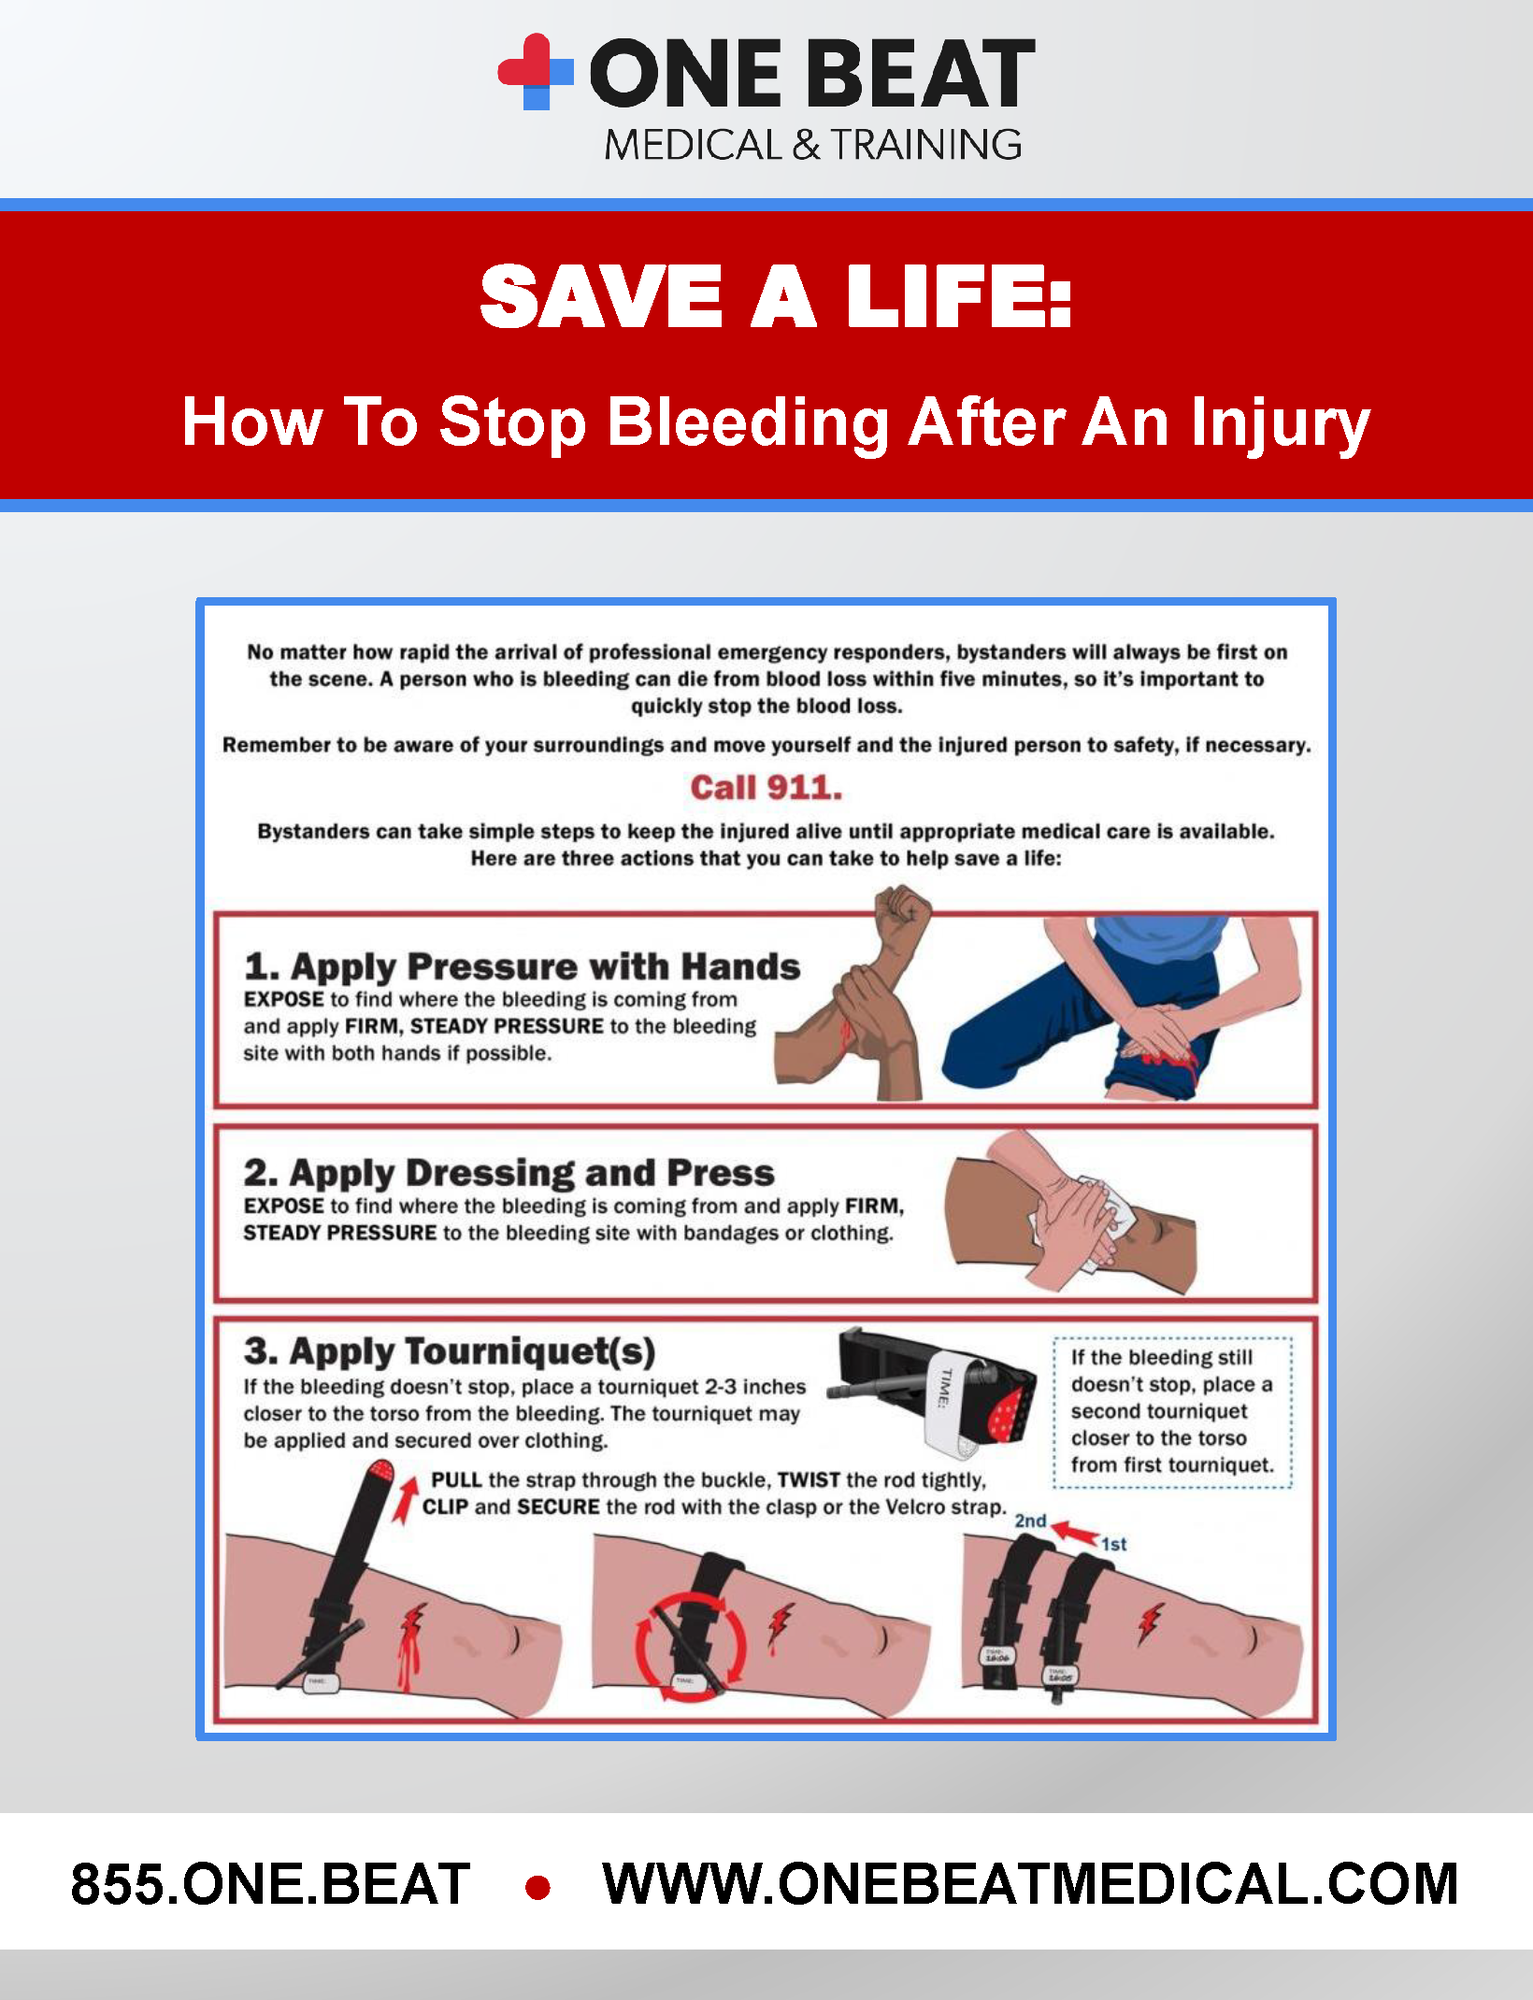
"Stop the Bleed" empowers individuals to take immediate action in a bleeding emergency, such as from a skate blade or collision injury. Training includes how to apply pressure, use a tourniquet, and pack wounds to prevent severe blood loss. Rapid intervention can save lives before EMS arrives.
3. AED (Automated External Defibrillator)
An AED is a portable device that delivers a shock to help restart a heart in sudden cardiac arrest. AEDs are easy to use with voice and visual prompts. Knowing the location of the nearest AED at the rink and how to use it can be critical during cardiac emergencies.

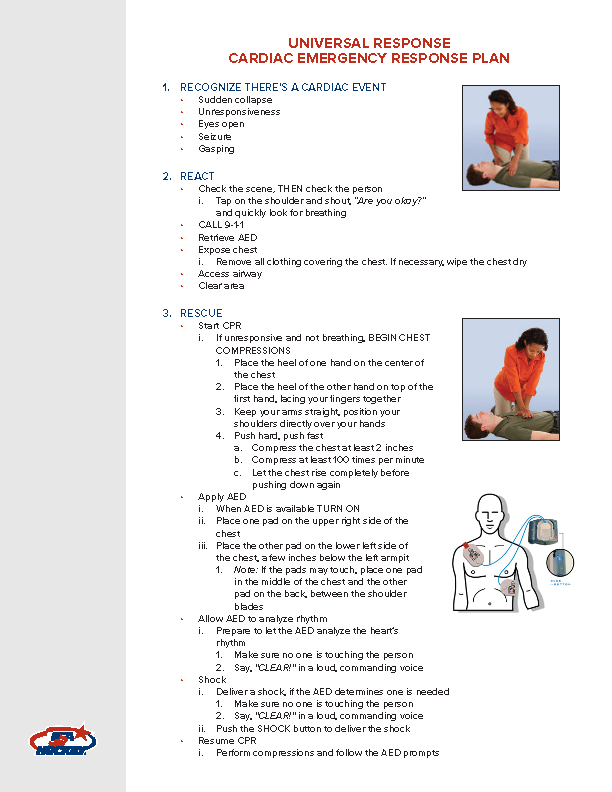
Cardiac Emergency Response Plan


Stop The Bleed

Hands Only CPR Video
1. Check Responsiveness: Tap the person and shout. If they do not respond and are not breathing normally, call emergency services (911).
2. Begin Chest Compressions: Place the heel of one hand on the center of the chest, place your other hand on top, and interlock your fingers. Press down hard and fast (about 2 inches deep) at a rate of 100–120 compressions per minute.
3. Open Airway: After 30 compressions, tilt the person’s head back and lift the chin to open the airway.
4. Give Rescue Breaths: Pinch the nose shut, make a seal over their mouth, and give 2 breaths, each lasting about 1 second (see if the chest rises).
5. Continue Cycles: Perform cycles of 30 compressions and 2 breaths until help arrives or the person starts to move or breathe normally.
If you are not trained or unsure about giving rescue breaths, do hands-only CPR: call for help and give continuous chest compressions
PREPARATION IS THE ESSENTIAL KEY TO SAVING LIVES.
AED Instruction Video
An Automated External Defibrillator (AED) is a portable device used to help restore a normal heart rhythm in someone experiencing sudden cardiac arrest. Here’s a brief description of how to use an AED:
1. Turn on the AED – Open the device and press the power button. Most modern AEDs give clear voice or visual instructions.
2. Expose the chest – Make sure the person’s chest is bare and dry.
3. Attach the pads – Place the adhesive pads on the person’s chest as shown on the diagrams (usually one pad on the upper right chest and the other on the lower left side).
4. Analyze rhythm – Allow the AED to analyze the person’s heart rhythm; do not touch the person during this step.
5. Deliver a shock if instructed – If the AED advises a shock, ensure no one is touching the person and press the shock button.
6. Resume CPR – After the shock (or if no shock is advised), continue CPR (chest compressions and rescue breaths) until emergency responders arrive or the person shows signs of life.
AEDs are designed to be used by laypersons and often provide clear, step-by-step guidance, making them an important tool in emergency cardiac situations.

Get Training... You could save a life!

American Heart Association https://www.heart.org/
American Red Cross https://www.redcross.org/
